





Fixing a Razor E300 Electric Scooter Tire: Step-by-Step Guide
Complete Razor E300 tire repair guide: Fix flats, replace pneumatic tires, upgrade to solid tires. Includes tools needed, troubleshooting tips, and maintenance for 2024-2025 E300 models. Step-by-step with photos.
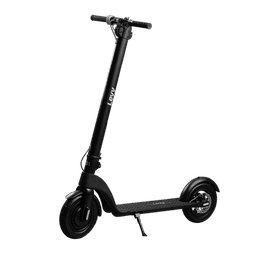
The Razor E300 electric scooter is one of the most popular models for teens and adults, featuring large 9-inch pneumatic (air-filled) tires that provide excellent shock absorption and a smooth ride. However, like any pneumatic tire, the E300's tires are susceptible to flats, punctures, and wear that eventually require repair or replacement. This comprehensive guide walks you through everything you need to know about fixing Razor E300 tires, from simple puncture repairs to complete tire replacement, upgrading to solid tires, and preventive maintenance to extend tire life.
Understanding Razor E300 Tire Specifications
Before beginning any repair work, it's important to understand the Razor E300's tire system and specifications.
Tire Size and Type
Standard specifications:
- Size: 9-inch diameter (typically 200mm or 8.5 x 2 inches)
- Type: Pneumatic (air-filled) tires on both front and rear wheels
- PSI rating: 30-40 PSI recommended (check sidewall for model-specific rating)
- Tread: Street tread pattern suitable for pavement and smooth surfaces
- Valve: Standard Schrader valve (same as car tires)
Front vs. rear tires: The Razor E300 uses the same size tires on both wheels, but the rear tire experiences more wear due to the motor and rider weight distribution. You'll typically replace rear tires 2-3 times more frequently than front tires.
Pneumatic vs. Solid Tires
Standard pneumatic (air-filled) tires:
Advantages:
- Excellent shock absorption and ride comfort
- Better traction on various surfaces
- Lighter weight improves range and performance
- Can adjust PSI for different riding conditions
Disadvantages:
- Susceptible to flats and punctures
- Require regular pressure checks and maintenance
- Need replacement when worn or damaged
Solid (airless) tire alternatives:
Advantages:
- 100% puncture-proof—no flats ever
- Zero maintenance beyond cleaning
- Consistent performance in all conditions
- Longer lifespan (3-5 years typical)
Disadvantages:
- Harsher ride with less shock absorption
- Heavier weight may slightly reduce range
- More expensive upfront ($40-60 vs $15-25 for pneumatic)
- Harder to install (requires significant force)
Tools and Materials Needed
Having the right tools ready before starting makes the repair process much smoother and prevents interruptions.
For Puncture Repair (Patching)
- Tire repair kit: Includes patches, rubber cement, and sandpaper/rasp
- Tire levers: 2-3 plastic or metal tire levers (bicycle tire levers work perfectly)
- Bucket of water: For locating punctures (submerge tube to find bubbles)
- Bike pump or air compressor: With Schrader valve adapter
- Wrench set: For removing wheel nuts (typically 10mm, 13mm, or 15mm)
- Screwdrivers: Phillips and flathead for various screws
- Clean rag: For cleaning rim and tire
- Marker or chalk: To mark puncture location
For Complete Tire Replacement
- All tools from puncture repair kit above
- Replacement tire and/or inner tube: 9-inch compatible with Razor E300
- Tire lubricant or soapy water: Helps tire seat onto rim
- Valve core tool (optional): For deflating quickly or replacing valve cores
- Wire cutters: If zip ties secure wiring
- Multimeter (for rear wheel): To test motor connections if disconnecting
For Solid Tire Conversion
- Heat source: Heat gun or boiling water to soften solid tires
- Tire lubricant: Dish soap solution works well
- Heavy-duty tire levers: Metal levers preferred for solid tires
- Safety gloves: Solid tire installation requires significant force
- Clamps (optional): To hold tire in place while cooling
Diagnosing Tire Problems
Before starting repairs, identify the exact problem to determine whether you need a simple patch, tube replacement, or full tire replacement.
Identifying Flats and Punctures
Symptoms of a flat:
- Visible deflation—tire looks saggy or completely flat
- Reduced ride height—deck sits lower than normal
- Rough ride—bumps felt more intensely
- Unusual handling—scooter pulls to one side
- Slow acceleration or reduced top speed
Types of punctures:
- Slow leak: Tire gradually loses pressure over hours or days (small puncture, valve issue, or aging tube)
- Fast leak: Tire deflates within minutes (moderate puncture from nail, glass, or sharp object)
- Blowout: Immediate complete deflation with loud pop (large tear, impact damage, or over-inflation)
Visual Inspection
External tire inspection:
- Look for embedded objects (nails, screws, glass, thorns)
- Check for cuts, tears, or gashes in the tire surface
- Inspect sidewalls for cracks, bulges, or separation
- Examine tread depth—if worn smooth, replacement is needed
- Check rim for dents, bends, or damage that could cause leaks
Pressure Test
Check tire pressure:
- Use a tire pressure gauge on the valve stem
- Compare to recommended PSI (typically 30-40 PSI, marked on tire sidewall)
- If pressure is low but not flat, inflate and monitor for 24 hours
- Listen closely to valve—hissing indicates valve leak
Removing the Wheel from Razor E300
Whether repairing a puncture or replacing the entire tire, you'll need to remove the wheel from the scooter. The front and rear wheels have different removal procedures.
Front Wheel Removal
Step-by-step front wheel removal:
- Step 1: Turn off the scooter and place on a stable surface or workbench
- Step 2: Locate the axle nuts on both sides of the front wheel (typically 13mm or 15mm)
- Step 3: Use appropriate wrench to loosen and remove the axle nuts (hold one side while loosening the other)
- Step 4: Remove any washers or spacers and keep track of their order for reassembly
- Step 5: Slide the axle bolt out, supporting the wheel so it doesn't fall
- Step 6: Pull the front fork apart slightly if needed and remove the wheel
- Step 7: Note the position of any spacers between the wheel and fork
Front wheel tip: The front wheel is straightforward with no electrical connections. Take a photo before disassembly to remember spacer and washer positions.
Rear Wheel Removal (Motor Wheel)
Important note: The rear wheel on the Razor E300 contains the hub motor, so you'll need to disconnect electrical connections carefully.
Step-by-step rear wheel removal:
- Step 1: Turn off scooter and disconnect the battery (remove battery compartment cover and unplug battery connector)
- Step 2: Locate the chain connecting the motor to the rear wheel—you may need to remove the chain guard
- Step 3: Loosen the rear axle nuts (both sides, typically 13mm or 15mm)
- Step 4: Disconnect motor wire connectors (typically 3 wires in color-coded connectors—note colors or take photo)
- Step 5: Slide the rear wheel forward to create chain slack
- Step 6: Remove the chain from the wheel sprocket
- Step 7: Remove axle nuts, washers, and spacers completely (organize them in order)
- Step 8: Slide the axle bolt out and remove the wheel
Safety reminder: Always disconnect the battery before working on the rear motor wheel to prevent accidental motor activation or electrical shock.
Repairing a Punctured Inner Tube
If the tire itself is in good condition and only the inner tube is punctured, patching the tube is the most economical repair option.
Removing the Tire from the Rim
Step-by-step tire removal:
- Step 1: Remove the valve cap and fully deflate the tire (press valve stem core or use valve core tool)
- Step 2: Push tire beads inward toward the center of the rim on both sides to break the seal
- Step 3: Insert a tire lever under the tire bead (not the tube) near the valve stem
- Step 4: Pry the tire bead over the rim edge and hook the tire lever to a spoke if possible
- Step 5: Insert a second tire lever 3-4 inches away from the first and repeat
- Step 6: Work the tire lever around the rim until one side of the tire is completely off the rim
- Step 7: Remove the valve stem from the rim hole
- Step 8: Pull the inner tube completely out from inside the tire
Caution: Be careful not to pinch or further puncture the inner tube with tire levers. Plastic levers are gentler than metal.
Locating the Puncture
Water submersion method (most reliable):
- Inflate the inner tube slightly (enough to give it shape but not full pressure)
- Submerge sections of the tube in a bucket of water
- Look for bubbles escaping from the puncture
- Mark the puncture location with a marker or chalk
- Check the entire tube—there may be multiple punctures
Alternative method (if no water available):
- Inflate tube to normal pressure
- Listen closely for hissing air
- Feel for escaping air with your hand or against your face
- Wet your finger with saliva and move it slowly around the tube—bubbles will form at the puncture
Patching the Tube
Step-by-step patching process:
- Step 1: Completely deflate the inner tube
- Step 2: Clean and dry the puncture area thoroughly
- Step 3: Roughen the surface around the puncture with sandpaper or the rasp from your patch kit (area slightly larger than the patch)
- Step 4: Apply a thin, even layer of rubber cement to the roughened area
- Step 5: Wait 3-5 minutes for the cement to become tacky (it should no longer be wet to the touch)
- Step 6: Remove the backing from the patch (avoid touching the adhesive side)
- Step 7: Firmly press the patch onto the cemented area, ensuring no air bubbles
- Step 8: Apply heavy pressure for 1-2 minutes (use a clamp or heavy object)
- Step 9: Wait 10-15 minutes before reinstalling to allow full adhesion
- Step 10: Test by inflating slightly and submerging in water again—no bubbles should appear
When NOT to patch:
- Punctures larger than 1/4 inch (6mm)
- Punctures on the sidewall or near the valve stem
- Multiple punctures close together
- Tubes that have been patched 3+ times already
- Aged, cracked, or deteriorated tubes
In these cases, replace the entire inner tube—new tubes cost $8-15 and are more reliable than multiple patches.
Reinstalling the Tire and Tube
Step-by-step reinstallation:
- Step 1: Inspect the inside of the tire for embedded thorns, glass, or the object that caused the original puncture—remove anything sharp
- Step 2: Check the rim tape (if present) is intact and covering spoke holes
- Step 3: Slightly inflate the inner tube (just enough to give it shape, not full pressure)
- Step 4: Insert the valve stem through the rim hole first
- Step 5: Tuck the inner tube inside the tire all the way around
- Step 6: Starting at the valve stem, use your hands to push the tire bead onto the rim
- Step 7: Work around the wheel, pushing the tire bead over the rim edge
- Step 8: The last section will be tight—use tire levers carefully if needed (avoid pinching the tube)
- Step 9: Ensure the valve stem is straight and perpendicular to the rim
- Step 10: Inflate to about half pressure and check that the tire is seated evenly on both sides
- Step 11: Inflate to full recommended pressure (30-40 PSI)
- Step 12: Install valve cap to keep dirt out
Replacing the Inner Tube Completely
When the inner tube is beyond repair, replacement is the best option. New tubes are inexpensive and provide worry-free performance.
Choosing the Right Replacement Tube
Compatibility requirements:
- Size: 9-inch or 200mm inner tube (check your specific E300 model)
- Valve type: Schrader valve (car-type valve, not Presta bicycle valve)
- Valve length: Standard length is fine; ensure it extends beyond the rim
- Quality: OEM Razor tubes or quality aftermarket brands (Kenda, Cheng Shin)
Where to buy:
- Razor official parts store: $12-18 (guaranteed compatibility)
- Amazon: $8-15 (many compatible options, check reviews)
- Local bike shops: $10-20 (may need to special order 9-inch size)
- Scooter specialty stores: $12-18
Installing New Inner Tube
Follow the same procedure as reinstalling a patched tube (see "Reinstalling the Tire and Tube" section above), with these additional tips for new tubes:
- New tubes may be more pliable and easier to install
- Inflate new tube slightly before installation to check for defects
- Apply a light dusting of baby powder inside the tire to reduce friction and prevent pinching
- Be especially careful not to pinch the new tube with tire levers during installation
Replacing the Entire Tire
When the tire itself is worn, cracked, or damaged beyond repair, you'll need to replace the entire tire. This is more involved than just replacing the tube but still manageable for DIYers.
When Tire Replacement is Necessary
Signs you need a new tire:
- Worn tread: Tread pattern is completely smooth or worn down
- Sidewall cracks: Visible cracks or dry rot on tire sidewalls
- Cuts or gashes: Deep cuts that expose the tire carcass or inner layers
- Bulges or bubbles: Indicates internal tire structure failure
- Age: Tires older than 3-5 years should be replaced even if they look okay
- Frequent flats: If you're getting flats repeatedly, the tire may have embedded debris or structural damage
Choosing Replacement Tires
OEM vs. aftermarket:
- Razor OEM tires: $20-35, guaranteed fit and performance matching original specifications
- Aftermarket pneumatic: $15-30, many quality options available (Kenda, CST, generic brands)
- Solid tire upgrade: $40-60, puncture-proof but harsher ride
- Honeycomb tires: $45-70, balance between pneumatic comfort and solid tire durability
Performance considerations:
- Street tires: Smooth tread for pavement, best for urban riding
- All-terrain tires: Deeper tread for light off-road use
- Puncture-resistant pneumatic: Thicker rubber or Kevlar-reinforced for fewer flats ($25-40)
Installing New Tire
Step-by-step tire installation:
- Step 1: Remove the old tire completely from the rim using tire levers
- Step 2: Clean the rim thoroughly, removing dirt, rust, or old rubber
- Step 3: Inspect rim for damage—straighten bent areas or file sharp edges
- Step 4: Check rim tape (if present) and replace if damaged
- Step 5: Place one bead of the new tire onto the rim completely
- Step 6: Insert the inner tube (new or repaired) inside the tire with valve through rim hole
- Step 7: Slightly inflate the tube to give it shape
- Step 8: Work the second tire bead onto the rim, starting opposite the valve
- Step 9: Use tire levers for the final tight section if needed (avoid pinching tube)
- Step 10: Ensure tire is seated evenly, then inflate to full pressure
Converting to Solid (Airless) Tires
Many Razor E300 owners eventually convert to solid tires to eliminate flat tires permanently. The installation is more challenging but the maintenance-free benefit is significant.
Benefits and Drawbacks
Key benefits:
- Zero flats—completely puncture-proof
- No maintenance—never check pressure or pump tires
- Consistent performance in all weather
- Longer lifespan—typically 3-5 years vs 1-2 for pneumatic
- No blowout risk
Drawbacks to consider:
- Harsher ride—less shock absorption on bumps
- Heavier—may reduce range by 5-10%
- Difficult installation—requires heat and significant force
- More expensive—$40-60 per tire vs $15-25 for pneumatic
- Cannot be repaired—must replace entire tire when worn
Solid Tire Installation Process
Preparation (critical for solid tires):
- Heat the tire: Place solid tire in hot water (150-180°F) for 10-15 minutes, or use a heat gun to warm the rubber (make it pliable)
- Lubricate: Apply generous amounts of dish soap solution or tire lubricant to both the rim and the inside of the tire
- Work quickly: Solid tires must be installed while still warm and pliable
Installation steps:
- Step 1: Remove pneumatic tire and inner tube completely
- Step 2: Clean and dry the rim thoroughly
- Step 3: Heat the solid tire until it's noticeably more flexible (10-15 minutes in hot water)
- Step 4: Apply lubricant liberally to rim and tire interior
- Step 5: Starting at one point, stretch the solid tire over the rim edge
- Step 6: Work around the rim gradually, pulling the tire over the edge section by section
- Step 7: Use tire levers for leverage (metal levers work better than plastic for solid tires)
- Step 8: Apply significant force—this is the most physically demanding part
- Step 9: Once the tire is on, ensure it's centered and seated evenly
- Step 10: Allow the tire to cool completely before reinstalling wheel (30-60 minutes)
Installation tip: Solid tire installation is challenging and may take 30-60 minutes per tire for first-timers. Having a second person to help can make the process significantly easier.
Reinstalling the Wheel on Razor E300
Once the tire repair or replacement is complete, reinstall the wheel following these procedures.
Front Wheel Reinstallation
- Slide the wheel back into the front fork
- Insert spacers in the same order you removed them
- Insert the axle bolt through both fork legs and wheel
- Add washers and thread axle nuts onto both ends
- Hold one side with a wrench while tightening the other
- Ensure the wheel spins freely without wobbling
- Torque to manufacturer specifications (typically 15-20 ft-lbs)
Rear Wheel Reinstallation (Motor Wheel)
- Position the wheel in the rear fork
- Loop the chain around the wheel sprocket before fully inserting axle
- Insert spacers in correct positions
- Insert the axle bolt through fork, wheel, and spacers
- Adjust wheel position to achieve proper chain tension (about 1/2 inch play up and down)
- Tighten axle nuts securely
- Reconnect motor wire connectors (match colors or refer to photo)
- Reconnect battery
- Test motor operation before riding
Chain tension check: Proper chain tension is crucial. The chain should have about 1/2 inch (13mm) of vertical play when you push up and down in the middle of the lower chain span. Too tight causes motor strain; too loose risks chain jumping off.
Testing After Repair
Before taking your newly repaired scooter on a real ride, perform thorough testing to ensure everything is working correctly.
Pre-Ride Safety Checklist
- Tire pressure: Verify pneumatic tires are inflated to 30-40 PSI (or manufacturer recommendation)
- Wheel security: Confirm axle nuts are fully tightened (wiggle wheel—should have no lateral play)
- Wheel spin: Spin each wheel—should rotate freely without rubbing or grinding
- Chain (rear wheel): Check chain tension and alignment
- Motor test: Turn on scooter and test throttle (rear wheel should spin smoothly)
- Brake test: Test brake function at low speed before riding
- Visual inspection: Look for any loose parts, wires, or components
Initial Test Ride
Gradual testing:
- Start with a slow test ride in a safe, flat area
- Listen for unusual sounds (rubbing, clicking, grinding)
- Feel for vibrations or wobbling
- Test braking at increasing speeds
- Verify handling feels normal and scooter tracks straight
- After 5-10 minutes, stop and recheck tire pressure and axle nuts
First 24 hours: Check tire pressure again after 24 hours of use—new tubes and tires may settle and require pressure adjustment.
Preventive Tire Maintenance
Regular maintenance significantly extends tire life and reduces the frequency of repairs.
Regular Pressure Checks
Frequency: Check tire pressure at least once per week, or before each ride if you ride infrequently.
Optimal pressure:
- Standard riding: 35-40 PSI for best performance and tire life
- Smooth surfaces only: Can use up to 40 PSI for efficiency
- Rough terrain: Lower to 30-35 PSI for better shock absorption
- Heavier riders: Use upper end of PSI range (38-40 PSI)
Underinflation problems: Tires below 25 PSI risk pinch flats (tube pinched between tire and rim), poor handling, and accelerated tire wear.
Visual Inspections
Weekly checks:
- Look for embedded objects (remove before they penetrate deeper)
- Check tread depth—replace when worn smooth
- Inspect sidewalls for cracks, cuts, or bulges
- Verify valve stem is secure and not leaking
- Examine wheel for true (spin wheel and watch for wobble)
Tire Cleaning
Regular cleaning:
- Wipe tires with damp cloth after muddy or dirty rides
- Remove debris from tread grooves
- Avoid petroleum-based cleaners that degrade rubber
- Use mild soap and water if needed
Proper Storage
Storage best practices:
- Indoor storage: Keep scooter indoors or covered to prevent UV damage to tires
- Inflation for storage: Maintain 30-35 PSI during storage periods
- Avoid extreme temperatures: Don't store in areas above 100°F or below freezing
- Elevate if long-term: For storage longer than 2 months, elevate scooter to prevent flat spots on tires
- Check monthly: If stored for extended periods, check and adjust tire pressure monthly
Common Problems and Troubleshooting
Repeated Flats in Same Location
Cause: Foreign object still embedded in tire or sharp edge on rim.
Solution:
- Thoroughly inspect tire interior by running your hand carefully inside (wear gloves)
- Check rim for sharp edges, burrs, or spoke protrusions
- Verify rim tape is intact and covering spoke holes
- Consider puncture-resistant tire liners or tire sealant
Tire Won't Seat Properly on Rim
Symptoms: Tire appears uneven or has bulge on one side after inflation.
Solution:
- Deflate completely
- Apply soapy water to tire beads and rim
- Inflate to maximum rated pressure (check sidewall) briefly to help tire pop into place
- Deflate to normal pressure once seated evenly
- If persistent, remove and reinstall tire
Valve Stem Leaking
Symptoms: Hear hissing from valve, tire loses pressure even when nothing is punctured.
Solution:
- Tighten valve core with valve core tool
- If still leaking, replace valve core ($1-3 for pack of several)
- If valve stem itself is damaged, replace entire inner tube
Wheel Wobbles After Reinstallation
Cause: Axle not fully seated or wheel not centered in fork.
Solution:
- Loosen axle nuts
- Ensure wheel is centered between fork legs
- Verify spacers are in correct positions
- Hold wheel centered while retightening axle nuts
- If wobble persists, check wheel true (may need professional truing)
Upgrade Options and Accessories
Puncture Protection Products
Tire sealant:
- Liquid sealant (Slime, FlatOut) added through valve stem: $8-15
- Seals punctures up to 1/8 inch automatically
- Can prevent 80-90% of common punctures
- Lasts 2 years before needing replacement
- Add 4-6 oz per tire for 9-inch wheels
Tire liners:
- Thick polymer strips installed between tire and tube: $12-20 per set
- Provide physical barrier against punctures
- Mr. Tuffy and Rhinodillo are popular brands
- Slightly increase rolling resistance
Armored tires:
- Kevlar-reinforced or thick rubber tires: $25-40
- Built-in puncture resistance
- Heavier than standard tires
- Excellent for urban environments with debris
Performance Tire Upgrades
All-terrain tires:
- Deeper, knobby tread for off-road capability
- Better traction on dirt, grass, gravel
- Slightly reduced efficiency on pavement
- $20-35 per tire
Street performance tires:
- Specialized rubber compounds for grip
- Optimized tread patterns for wet/dry performance
- May wear faster than standard tires
- $25-40 per tire
Cost Breakdown and Time Estimates
DIY vs. Professional Repair
DIY costs:
- Puncture patch: $5-10 (entire patch kit with multiple patches)
- New inner tube: $8-15
- New pneumatic tire + tube: $25-40
- Solid tire conversion: $40-60 per tire
- Tool kit (one-time): $20-40 if you don't have basic tools
Professional service costs:
- Flat repair/patch: $15-30
- Tube replacement: $25-45 (parts + labor)
- Tire replacement: $40-70 (parts + labor)
- Solid tire installation: $70-120 (parts + labor)
Time estimates (DIY):
- Patching tube: 30-60 minutes (first time), 20-30 minutes (experienced)
- Tube replacement: 30-45 minutes
- Full tire replacement: 45-90 minutes
- Solid tire installation: 60-120 minutes (challenging for beginners)
Conclusion
Fixing a Razor E300 electric scooter tire is a manageable DIY task that ranges from simple puncture patching (30-60 minutes and $5-10) to complete tire replacement or solid tire conversion (60-120 minutes and $25-60). Understanding your repair options—from quick patches for small punctures to full pneumatic tire replacement for worn treads, or even upgrading to maintenance-free solid tires—empowers you to choose the best solution for your situation and budget.
Key takeaways for Razor E300 tire repair:
- Tire specs: 9-inch pneumatic tires, 30-40 PSI, Schrader valve, same size front and rear
- Common repairs: Puncture patching ($5-10, 30-60 min), tube replacement ($8-15, 30-45 min), full tire replacement ($25-40, 45-90 min)
- Solid tire option: 100% puncture-proof but harsher ride, challenging installation, 3-5 year lifespan
- Essential tools: Tire levers, patch kit, pump, wrenches (10-15mm), bucket for leak detection
- Rear wheel caution: Disconnect battery before working on motor wheel, note wire colors for reconnection
- Preventive care: Check pressure weekly (35-40 PSI optimal), inspect for embedded debris, store indoors
- Puncture prevention: Tire sealant (80-90% effectiveness), tire liners ($12-20), armored tires ($25-40)
- When to replace tire: Worn smooth tread, sidewall cracks, age 3-5+ years, repeated flats
- Chain tension: 1/2 inch vertical play on rear wheel reinstallation
- Cost savings: DIY repairs save 50-70% vs professional service
By following this comprehensive guide, most Razor E300 owners can successfully repair or replace their scooter tires at home with basic tools and moderate mechanical skills. Regular tire maintenance—including weekly pressure checks, visual inspections, and proper storage—significantly extends tire life and reduces the frequency of repairs. Whether you choose to stick with pneumatic tires for maximum comfort or convert to solid tires for zero-maintenance operation, proper tire care ensures your Razor E300 continues providing reliable, smooth transportation for years to come. Remember to always test thoroughly after any repair, check tire pressure after the first 24 hours of use, and don't hesitate to consult professional repair services if you encounter difficulties beyond your comfort level.