





Step-by-Step Guide: How to Change the Back Wheel on an Electric Scooter
Learn how to change the back wheel on your electric scooter with this step-by-step guide. Ensure a safe and smooth ride with our easy-to-follow instructions.
Introduction
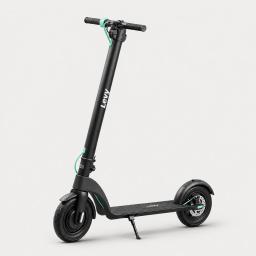
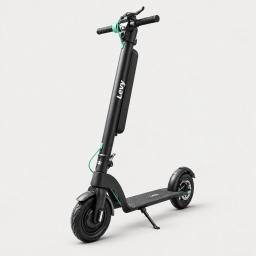
Changing the back wheel on an electric scooter might seem daunting, but with the right tools and instructions, it's a task you can easily accomplish at home. Whether you're looking to replace a worn-out tire or upgrade to a better one, this guide will walk you through the entire process.
Tools You'll Need
Before you start, gather these essential tools:
- Wrench set
- Screwdriver (flathead and Phillips)
- Allen keys
- Replacement wheel
- Lubricant (optional but recommended)
Step-by-Step Instructions
Turn Off and Secure the Scooter: Always ensure your scooter is turned off to avoid any accidental starts. Secure your scooter on a flat surface or a stable workbench.
Remove the Rear Fender: Use a screwdriver to remove any screws or bolts holding the rear fender in place. This will give you clear access to the back wheel. Keep the screws in a safe place for reassembly.
Loosen the Axle Nuts: Using the appropriate wrench, loosen the axle nuts on both sides of the wheel. If your scooter has a motor wire connected to the wheel, be careful not to damage it.
Detach the Wheel: Carefully pull the wheel away from the scooter frame. If the wheel is connected to a motor or brake system, you may need to carefully disconnect those components first.
Replace the Wheel: Position the new wheel in place, ensuring it aligns properly with the axle slots and any motor or brake components.
Tighten the Axle Nuts: Re-tighten the axle nuts securely, being careful not to over-tighten, as this can damage the threads or the new wheel.
Reconnect Any Components: If you had to disconnect any wiring or brake components, reconnect them now. Ensure each component is properly aligned and secure.
Reattach the Rear Fender: Use the screws you set aside earlier to reattach the rear fender. Ensure it is securely fastened and does not interfere with the wheel's movement.
Test the Wheel: Before riding, give the wheel a few spins to ensure it moves freely without any obstructions. Turn on your scooter for a test ride at a low speed to confirm everything is functioning correctly.
Conclusion
Changing the back wheel on an electric scooter can be a simple process if you follow these steps carefully. Regular maintenance helps extend the life of your scooter and ensures a smooth, safe ride.
Frequently Asked Questions (FAQs)
How often should I change the back wheel on my electric scooter?
It depends on usage, but generally, inspect your wheels every 3-6 months for wear and tear.
Can I use any type of wheel for replacement?
No, always use wheels specifically designed for your electric scooter model.
- Do I need professional help?
- Most users can do this themselves, but if you're unsure, consulting a professional is a good idea.